Loading
PLANTED TERRARIUM / VIVARIUM GUIDE
This is a really general guide that will touch on a number of topics and methods but may not go in depth for each of them. The guide will more or less assume that you are using a medium to large exo-terra and will be setting it up for a small arboreal gecko. However, many of these principals can be applied to larger tanks and different animals
Find your terrarium
Most of the time, this means an exo-terra vivarium, usually the 18 x 18 x 24 (45cm-45-60) size. This is a very versatile size, capable of housing 1 or 2 small to medium arboreal geckos (e.g., one giant day gecko, two female crested geckos). They also work well - with a bit of tampering - as temporary housing for young arboreal snakes (e.g., young green tree pythons, Solomon Island tree boas, etc). Adjust to your own needs, and feel free to contact me if you have any questions.
If you are not using an exo-terra, make sure you test the bottom to ensure that it will not leak. You can expect to have 1-2" (2-5 cm) of water in the bottom at any given time.
The Background
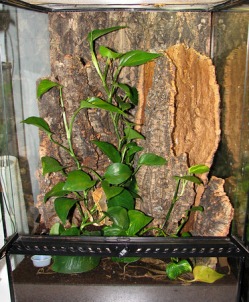
Personally, I hate the styrofoam backgrounds that come with exo-terras. Crickets eat them, jam themselves behind them, and I loathe that squeak of styrofoam-on-glass. I do like a nice background, however, and I often use Zoomed Cork Tile Backgrounds. www.petsandponds.com will usually special order them for you (last time I checked, the price came to about 8 cents per square inch, and they are even cheaper at reptile expos. I usually cut off the bottom two inches of the tile so it doesn't sitting in the water in the bottom of the tank. Silicone the tile to the back of the tank (before starting to add the dirt, obviously).
Another option is to use a coconut fibre sheet. You cut to size, silicone to the background, and you're done. You can silicone pieces of driftwood (not too heavy) or cork bark to it if you like.
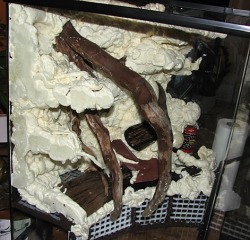
A very popular option, and one that enables you build in a water feature if you want, is to use Great Stuff Foam, Brown Silicone, and dry Coconut Mulch. It is a long, time consuming (and messy!) process, but it can make for some stunning results. For a more extended guide on how to do this, do a quick Google search. There are plenty of pictorials out there. In short, you use the GS Foam on the back of the tank to create a background. Wear gloves. You can shape branches, ledges, etc, and you can also silicone pieces of wood to the back and work around it with the foam. When it has dried (overnight or longer), you can carve it with a knife, and when you're happy with it, begin applying brown silicone to the foam, one area at a time. Using your gloves fingers, push the silicone into the cracks and crevices and then push some completely dry coconut mulch onto the silicone. Repeat until the entire background is covered, and let cure for a few more days.
A Note on Water Features
There is so much to be said here that I'm not going to go into detail. Basically, if you want a water fall, you need to create a false bottom with a water pump in it, that pushes the water up through a silicone tube to the top of the background and to the waterfall area (such as a curved pieces of cork bark or driftwood).
Removable Dowels
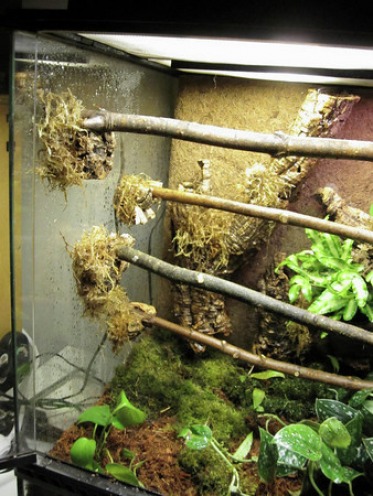
If you are making a vivarium for an arboreal snake, I highly recommend removable dowels. They are easy to remove to clean, and make it very easy to remove the snake to feeding, handling, cleaning, etc. If you have a wood terrarium, you can use a hook and eye, with the eye part screwed into the terrarium wall and the hook part screwed into the end of the branch. I prefer to use pieces of cork bark siliconed to the side of the tank, because it looks more natural.
- You want your cork bark pieces to be as flat as possible. Either find a very flat one, or use a handsaw to cut off the jagged back of your piece, or use a belt sander. The flatter it is, the better it will adhere. Each dowel support will need to be about 3" x 2", but adjust to your needs and the size of your dowels.
- Cut out a groove for the branch. You can either use a handsaw to cut out a "v" and then break it out with your fingers, or simply use a drill with a drill bit slightly larger than the thickness of the dowel.
- Silicone your dowel holders in place (tip your tank on its side so the dowel supports will stay in place while the silicone dries - do one side first, then the other).
*A note on branches/dowels:
There are number of options out there for dowels or branches. The easiest is to go out into the woods and cut branches off of live trees. Make sure you do this legally and safely, and do not decimate entire trees. Also avoid branches that are dead, have rough bark, thorns, or that come from coniferous trees.
Bamboo works well. You can get it in home improvement stores in various thicknesses, and just cut to size.
You can also use pvc pipe, cut to size. Taking a blowtorch to it will make brown marks and can make it look a little more authentic, but do it outside where there is ventilation.
Driftwood is great if you can find it in the right size and shape. I have had great success with Manzanita wood.
Grapevine will do well for most terrariums, but can get a little moldy in very high humidity (constantly over 90%).
Start from the bottom up!
Drainage Layer
Assuming you want something tropical (as opposed to a drier environment), you will need to keep your soil and plants moist. Letting the soil dry and then watering it is impractical because pouring water in makes holes in the dirt, and some types of dirt are difficult to re-moisten once they dry (such as coco mulch).
A drainage layer is basically a layer of something solid but porous at the bottom of your tank - under the dirt - that will allow water to collect there and slowly feed it up to the soil above it so the soil stays moist.
- Expanded clay pellets: very light, orangey spheres of porous fired clay. Rinse them before use. They are not expensive, but can be hard to find. Try your local hydroponics store. This is the ideal method.
- Aquarium gravel: very heavy, but easy to find and you can get them in dark brown. Because the pellets are so compact, you will need a fair amount of it.
- Smashed clay pots: yep, just the plain, unglazed clay pots and saucers you get at the garden supply store. Put them between two dish towels, and smash them into small pieces with a rolling pin or a hammer. This method if a bit awkward because you get pointy pieces that make it difficult to layer smoothly, but it's cheap, easy, and readily available.
- Aquarium filter sponges: I don't really recommend this, but I've done it. If you can find large sponges and lay them side-by-side in a layer on the bottom of the tank, that will act as drainage. Just make sure they are dense enough to get not get squashed by the weight of the dirt.
Whatever you use, you want about 2 inches of it.
Something to consider is how the drainage layer will look. If you use a dark brown gravel, it's not an issue. But if you're using clay pellets, smashed pots, blue aquarium sponges etc, it can look very "colorful" and not so natural. To remedy this, you can line the bottom few inches of the outside of the vivarium with a black shelf liner. You can also coat the bottom few inches on the inside of the tank with a black or brown silicone (use GE II 100% pure silicone). Lastly, you can get some black aquarium sponges and create a "border" around the drainage media you use, so when viewed from the outside, you will only see the black sponge under the dirt which is not very visible.
The barrier
You will need to use something to keep the drainage and the dirt layer from mixing together. You can use polyfill (it comes in big rolled-up sheets for a few bucks at Walmart). Just cut out a piece the size of the floor space of your terrarium and place it over the drainage layer.
Plastic needlework mesh or plastic window screen also works. Use as described above. This is my preferred method but I like to use two layers of it. For maximum dirt blockage, use a layer of polyfill sandwiched between two pieces of needlework mech or window screen.
*A note on filtration: If you do not create a false bottom, there isn't an easy way to actually filter your water, but that isn't a big deal. The plants should do a pretty good job, and you will be adding new water on a regular basis. As long as you spot clean before bacteria can get everywhere, you're gold. You can also use bio-active substrate (more on that later); the little organisms will certainly help keep the soil healthy. Some people put a layer of activated carbon between two layers of barrier. You can absolutely do this, but I honestly wouldn't bother. The carbon doesn't stay active forever and it's impossible to replace once it "expires". If you have a spare jar of carbon around, go for it. Otherwise, you don't need to bother unless you want to.
Soil
The Soil Question can be complexe or simple, depending on your needs. Personally, I like to use coco fibre as a base and mix in some or all of the following:
- Black earth (nice and rich, but clumps together if it's too concentrated)
- Chopped sphagnum moss (increase drainage and humidity within the soil)
- Orchid bark or coco bark (I would not use this with animals that hunt crickets in case they get a mouthful of it and choke)
- Peat moss (good for the plants, but not renewable, and not good for the environment)
- Sand (not really necessary, but some swear by a handful or two thrown into the mix as it increases drainage)
At least a few inches of soil is required. I usually just bring it almost to the rim of the bottom ledge of the exo-terra.
Moss layer
This layer is not necessary, but I like to do it with certain tanks. I wouldn't use it in a gecko tank, but I do in snake tanks. It is basically spreading a layer of sphagnum moss across the bottom. It holds humidity and looks nice.
An alternative to this for geckos is using dried oak leaves. Spread them on the soil and your geckos will love it. Plus, they are free: collect them in the fall and boil them before use.
If your environment will be high humidity, or will be sprayed often and has little ventilation, you can use live moss. I pillage from the woods, but you can also buy "frog moss" from pet stores - it is dry, but comes back to life when you water it. However, mosses will die with constant humidity so take care to spray often (twice a day), block most of the screen lid, install an automatic mister, or, if you have a water feature, aim the flow towards the moss area.
Bio-active soil
I highly recommend bio-active soil. The little bugs and critters in the soil help break down organic waste and will keep the soil aerated. The simplest way to do this is to go out into the forest (or your garden if you don't use any chemicals on it) and scoop up some soil, and mix it in with the dirt in your tank. The microorganisms and little bugs in the soil will spread through the dirt.
Lighting & Plants
Before you can pick out plants, you can decide on your light. Is the tank getting some light from a window? Or just room light? Or are you going to put a fluorescent light fixture over the tank? If you are in a low-light scenario, you will have to limit yourself to low-light plants:
- Pothos - lovely, impossible to kill. Trim regularly. It comes in many varieties including neon and silken.
- Zamioculcas Zamiifolia - aka ZZ plant - very nice, sturdy, but gets very big and will eventually need to be transplanted.
- Philodebdron - A nice, dark green vine.
If you have higher light, you can pick from many other plants such as:
- Snake plant - very sturdy.
- Jewel Orchid - tough, and gorgeous, if you can find it.
- Bromeliad and air plant - you can silicone air plants to the tank background
- Orchids (and mini orchids) - they may even flower
- Lipstick plants
- Small ferns
- Spider plants
Maintenance
The easy part is setting it up, the hard part is keeping it going.
- Always have some water sitting in the drainage layer of the tank, but never high enough that the dirt is waterlogged.
- Do not use chemical fertilisers. If you have a fresh water aquarium, use the water from your water changes to top up the water. You can also use the water left over when you boil or steam spinach, artichokes, etc. Use monthly or so, depending on the plants you have.
- Spot clean feces and urates as you see them.
- Spray daily.
- Trim your plants as they get too big.
- Cork bark tubes make nice decor in this type of set-up, as does manzanita driftwood.
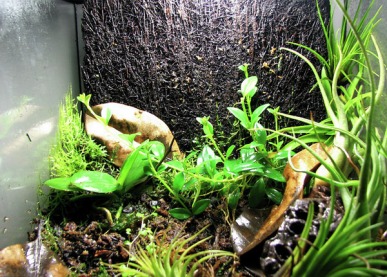
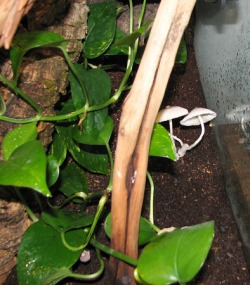
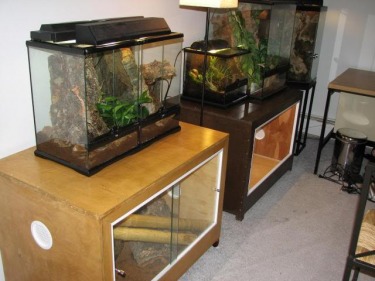
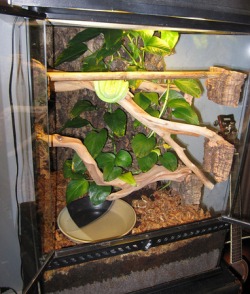
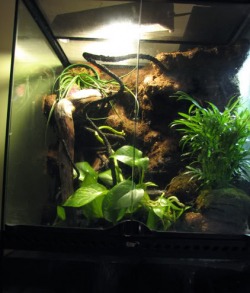
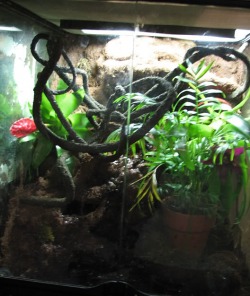
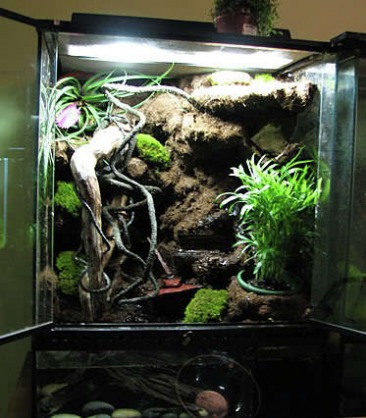
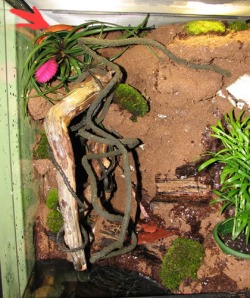
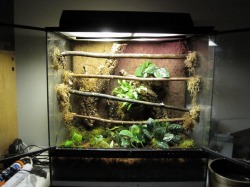
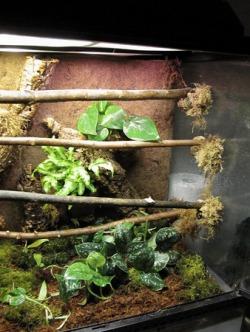
Here are some photos of vivariums I have put together over the years:
For more pictures of the process, see: http://s114.photobucket.com/albums/n...es/snakes/DIY/
A heartfelt thank you to the many helping to build this site.
HOME
Loading
