Loading
HOW TO BUILD A DART FROG VIVARIUM
WRITTEN BY: HELEN HOUGHTON
http://www.reptileforums.co.uk/
http://www.reptileforums.co.uk/
Well, who’d have thought my ‘relaxing hobby’ could bring forth three days of such stress!! Ive trashed my bedroom, flooded the flat and wreaked havoc upon varying parts of my body – and what do I have to show for it?
Well... quite a pretty viv.
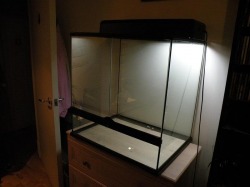
Step 1 – Clean and disinfect viv. I used a 60 x 45 x 60 exo terra viv for my froggies, it works well but they do need some modifications to be suitable for darts. (The hood has one full spectrum bulb in it for the plants.)
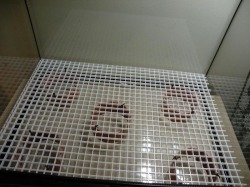
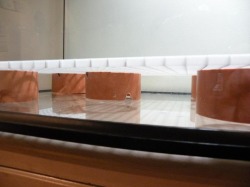
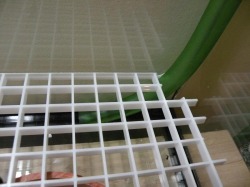
Step 2 – make a false bottom. I bought egg crate (fiver from eBay) and used some PVC poo pipe (NOT pre-used!!) which I cut into 2” sections, cut a notch out of the bottom to allow water in/out and drilled two holes near the top to attach to the egg crate with plastic ties.
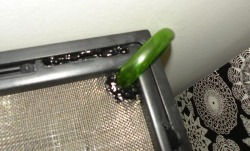
Step 3 – Fly-proof the exo terra. I used black silicone to seal up the wire holes on either side of the exo terra hood, to stop fruit flies escaping. At the same time I cut a hole in the top for the ‘water out’ pipe and siliconed this in place, I also cut a section out of the egg crate to put the end of the pipe into the false bottom.
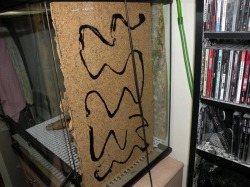
Step 4 – Cut cork bark to size with a Stanley knife and silicone these to the sides/back of viv. Again I used black silicone as I couldn’t be bothered to change the tubes, I plan to stick an attractive screen to the outside of the viv so I don’t have to look at my dodgy silicone work! At this stage I made sure I hid the pipe behind the cork bark.
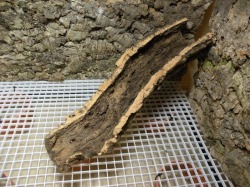
Step 5 – Cut a cork bark tube in half to make a stream bed. (take care how you cut the cork – I wasn’t paying attention and cut a sizeable chunk out of my right thigh and wrecked a nice pair of jeans!) Position the cork bark so you get an idea of how low down you should make waterfall to.
Step 6 – Make the waterfall. OH GOOD LORD WHAT A MESS!!! Expanding foam is quite possibly the most horrible substance ive ever had to use – and I spend most of my time in a chemistry lab! You WILL get it on your hands – so wear gloves!!! (I didn’t wear gloves and now – 3 days later – my hands still look and feel 90 years old!)
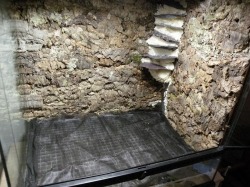
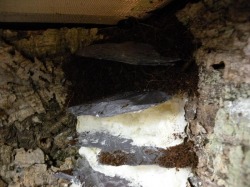
Spray the area you want to put your waterfall with water so the foam will cure properly, the add foam and push in thin bits of slate, you’ll need sticks or similar (wooden spoons in my case..) to hold up the slate while the foam dries. Dont do anything while the foam dries – leave it for at least 12 hours.
Spray the area you want to put your waterfall with water so the foam will cure properly, the add foam and push in thin bits of slate, you’ll need sticks or similar (wooden spoons in my case..) to hold up the slate while the foam dries. Dont do anything while the foam dries – leave it for at least 12 hours.
Step 7 – add a membrane to the false bottom – I used the anti-weed fabric you get at garden centres. Then use more foam to stick your stream bed in place.
Step 8 – Make the waterfall look realistic. Use a sharp craft knife and sandpaper to shape the foam how you want it, cover the dry foam in black silicone then press eco earth into it, this makes it look like a rocky dirt bed.
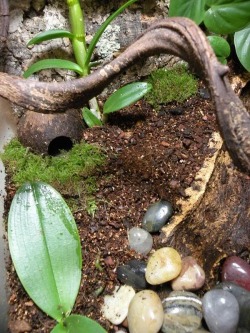
Step 9 – Add a layer of Hydroleca to the false bottom, followed by another layer of membrane. Use pebbles to prop up your stream bed into the right place,.
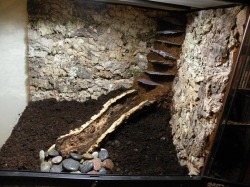
Step 10 – Now for the fun part. Mix orchid bark and orchid soil, I ‘landscaped’ this around the stream bed and then added a thin layer of dendrosoil – this is full of tropical woodlice and springtails which should deal with any fungus and poo in the viv.
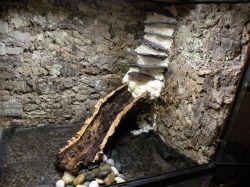
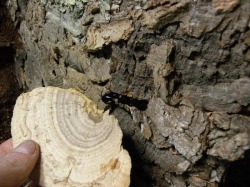
Step 11 – Mushrooms. I bought these dried sponge mushrooms from Rodbaston last November and decided to use them here, I cut a slit in the cork bark, filled it with silicone then pressed a mushroom into it. Any black silicone that squidged over the edge I covered with eco earth.
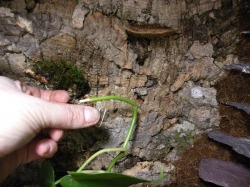
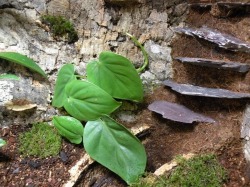
Step 12 – Planting. I used a climber, a bromeliad, two orchids and a member of the asparagus family in this viv, I have another two bromeliads on order and some climbers – but ill update this thread with pics when ive planted those. To fix the climber to the wall I used cut paper clips pushed into the cork bark. I also added a twisty stick and two spawning houses.
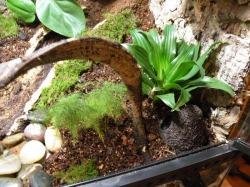
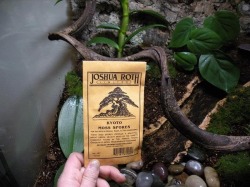
Step 13 – Moss. I used sheet moss in small clumps on the floor and on some of the sides, and also used Koyoto moss spores which should work within 4 weeks (Koyoto moss is very hit and miss – sometimes it germinates, sometimes not so ill have to wait and see with this one.)
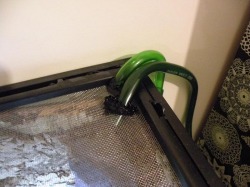
Step 14 – Put the ‘water in’ tube through a hole in the mesh and silicone it in place. Also cut two pieces of vinyl to size to cover the mesh at the front of the viv to keep humidity in.
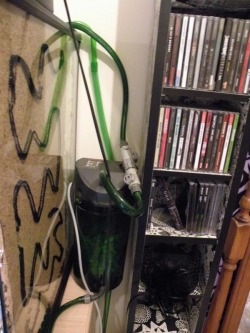
The filter is hidden next to the viv, its an Eheim filter that I got as an absolute bargain from a shop in Kidderminster for just £20 second hand!
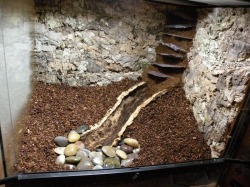
Ive got to wait until tomorrow to switch the filter on because the silicone has to dry, but ill update this thread when everythings grown in and is running smoothly. Im leaving it to mature for a few weeks before putting froggies back in, anyhow – heres the finished viv!

Beautiful vivarium, Helen.
On behalf of the visitors to the Bamboozoo, we sincerely appreciate your efforts to document and educate others.
Helen can be found at: http://www.reptileforums.co.uk/
On behalf of the visitors to the Bamboozoo, we sincerely appreciate your efforts to document and educate others.
Helen can be found at: http://www.reptileforums.co.uk/
