Loading
NATURAL Western Hognose BOA VIVARIUM
(Heterodon nasicus)
WRITTEN BY: JASON MORROW
AKA jabba1967 @http://www.reptileforums.co.uk/
Now that I have my two Hoggies, I thought I would show you how I made their new home.
Now if you are the kind of person that thinks all snakes live in R.U.Bs, then you may want to stop reading now.
But for those of you out there that want a bright attractive desert looking, natural viv, then read on
This is the sort of environment I want to recreate.
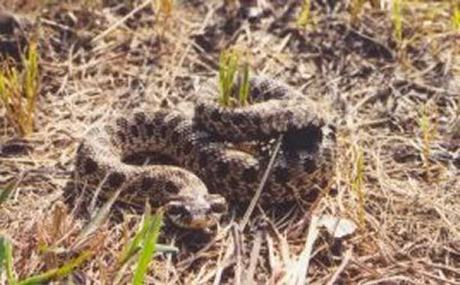
A mixture of sandy soil with grass, I hope over time that some of the grass I have put in the viv will brake down and become litter on the floor like this.
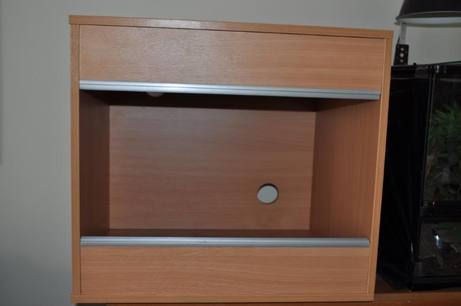
The Viv.
This is a standard 24x18x21 wood viv, so the first thing to go in was the supports for the false floor.
This is a standard 24x18x21 wood viv, so the first thing to go in was the supports for the false floor.
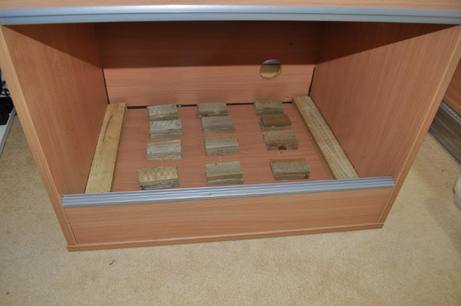
This was just some bits of wood I had laying around, next I put in the heat cable;
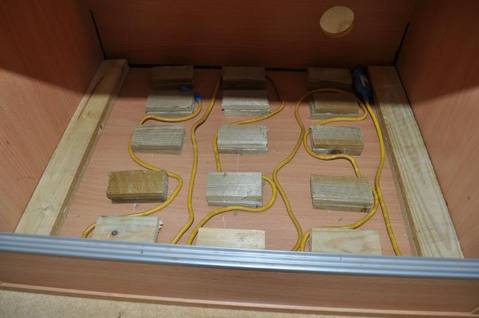
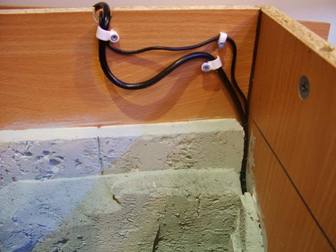
I placed the stat probe about 2" off the floor inside the viv, but I found that the temps on the floor hit 100f befor the stat kicked in to lower the heat. So in the end I drilled another hole in the back left corner of the viv, and pushed the stat probe through, so now the probe is in direct contact with the heat cable, the temps now don't get above 85f.
This was where the stat probe and thermometer probe went down the back, now only the thermo probe goes down here;
This was where the stat probe and thermometer probe went down the back, now only the thermo probe goes down here;
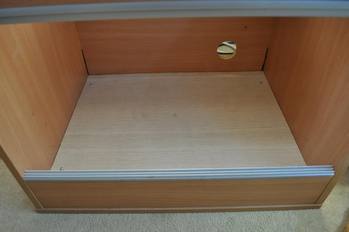
Last but not least, the floor, this is just 3 or 4mm plyboard.
if you are going to heat your viv with heatmats or cables, then you will want to only cover about one third of the viv. In this build I have two hides, one is in the top left corner, the other is on the right, about midway down. I would put the mat/cable under the back left corner hide, so the snakes would have the choice of a "hot" hide, and a "cool" hide.
However, I'm heating this viv with lights, the cable is there for night time heat if the temps drop below 60f.
FAKE ROCK WALLS
To make the Fake rock I used "Kingspan" insulation foam, this is far easier to sculpt than polystyrene.
So I put one thin board against the back as a "base";
To make the Fake rock I used "Kingspan" insulation foam, this is far easier to sculpt than polystyrene.
So I put one thin board against the back as a "base";
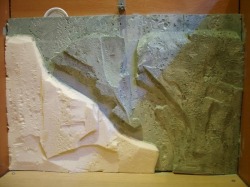
I then got some smaller pieces, and shaped them;
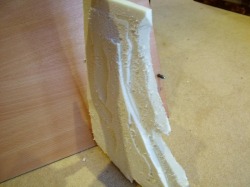
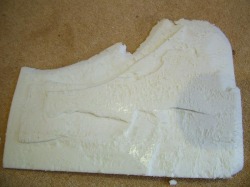
I then stuck these to the piece, that was already there;
Next came the paint, just normal emultion, I wanted to get a colour close to the base colour of the stone;
Next came the paint, just normal emultion, I wanted to get a colour close to the base colour of the stone;
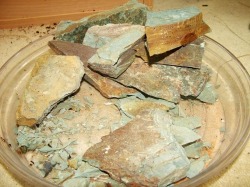
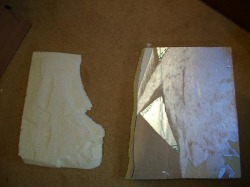
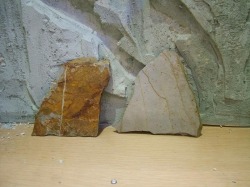
This is the stone I will be using in the viv, it is like slate, it can be split easily, this will reveal a green coloured stone. It is brown (rust) on the outside, where it has been exposed to the eliments, (if you leave it in water for a couple of weeks, it will rust nicely )
So this is the back painted;
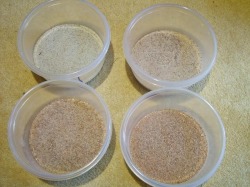
So now to make the backing more rock like, I used epoxy resin to stick the sand to the backing, as it's like concrete when it sets. I used a mixture of bird sand, exo terra red desert sand, and exavator clay. I mixed up four pots of this adding more desert sand and clay in each one, so I had four different colours of sand for texture;
I mixed up 20ml of epoxy at a time, epoxy will dry very fast if kept in the pot you mix it in, but it takes ages to dry when you spread it thin, so get it on the backing quickly .
So I covered one panel with epoxy, then sprinkled on the different coloured sands;
So I covered one panel with epoxy, then sprinkled on the different coloured sands;
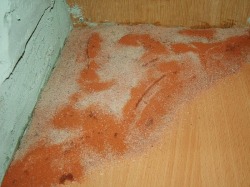
You can see in this pic that the epoxy keeps coming through, if you leave it like this, it will look "wet" when dry, so you have to keep putting more sand on to soak up the damp patches. If I was to do this again, I would only cover the areas I wanted in a particular colour, and just use that colour sand, when this dries, I would then add the next colour. The reason for this is because it's easy to forget what sand colour you put down in an area, so you end up putting the wrong colour sands on the damp patches. You also end up with all your left over sand being mixed up, so you can't put the unused sand back.
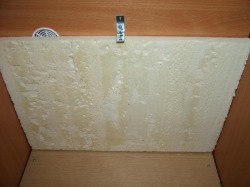
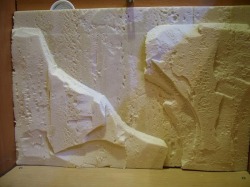
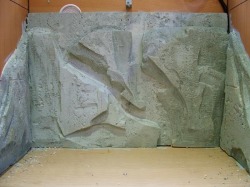
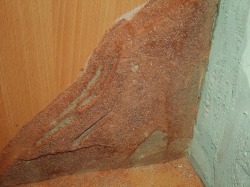
Anyway, this is what this panel looked like finished;
Anyway, this is what this panel looked like finished;
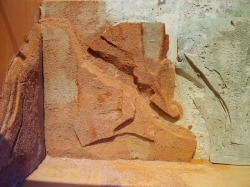
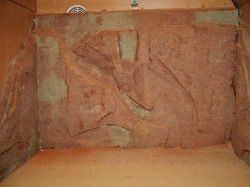
And this is the rest;
Next, the vents, I put one each side at the bottom;
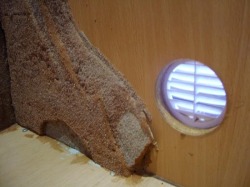
I have put fly screen behind these vents now I have seen how small these snakes are.
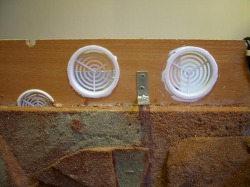
And I put two at the top back, I am toying with the idea of putting fans up there to suck out the air if the viv gets too hot in the summer
And I put two at the top back, I am toying with the idea of putting fans up there to suck out the air if the viv gets too hot in the summer
I have already experimented with planting Carex grass straight into clay soil in my beardie viv, and 4 months on it's still there, a bit flat...But there none the less. So if the grass can handle a beardie, then a couple of Hoggies should be no problem. But as backup, I decided to plant some of the grass in pots, as this should pretty much guarantee that at least half my grass will live.
As for the grass I planted directly into the clay, though I don't expect it to live, it should stay together, this is why I chose carex bronze sedge grass, as it is tough.
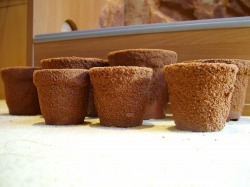
So first things first, I got 5 pots, and used epoxy to stick sand to them;
As for the grass I planted directly into the clay, though I don't expect it to live, it should stay together, this is why I chose carex bronze sedge grass, as it is tough.
So first things first, I got 5 pots, and used epoxy to stick sand to them;
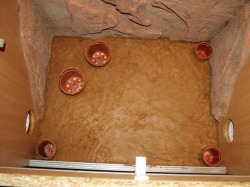
I then mixed up some clay soil to line the bottom of the viv, and to hold the pots in place;

This is it dry, I quite like the way it cracked, it has given me an idea of what I might do in my beardie viv, cracked river bed perhaps?
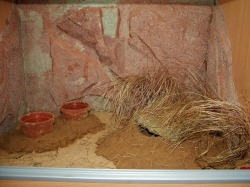
Next was to build the hide, I was only going to build the one hide, but in the end I put two in. This one was made using clay soil...Again;

I also planted two of the grasses that were to go directly into the clay, I then put the rock on before the clay dried, so I could press it down and mould the clay to the contours of the rock to try and minimize gaps that light could get through;
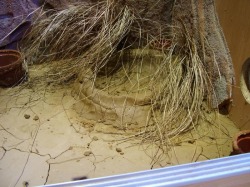

Then it was just a case of adding more clay, and grass till all the grass was in;
So with all the grass and clay in, I then put in a layer of fine hogging, I'm hoping this will act as a barrier to stop the Hoggies digging down into the clay and digging up my grass.
So now it was time to start hiding the pots. To do this I simply smashed up a load of the rock that I had, I built some walls;
So now it was time to start hiding the pots. To do this I simply smashed up a load of the rock that I had, I built some walls;
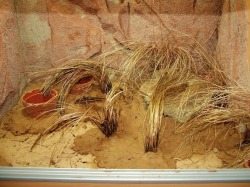
When all the walls were built, I put in the exo terra red desert sand;
Now it was just a case of putting in the rest of the grass, some rock chips for decoration, and the second hide. I got lucky with this as the rock I wanted to use was way too big, so I first spit it to make it thinner, but the hard bit was to get the rock to fit around the grass, I just resorted to smacking it with a hammer...It broke perfectly
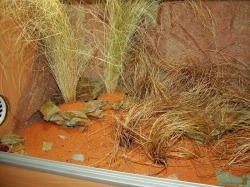
The grass I used at the back is different from the rest, I don't know what kind it is, but if it dies it can easly be replaced.
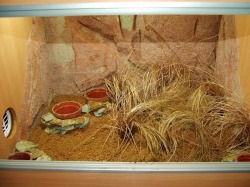
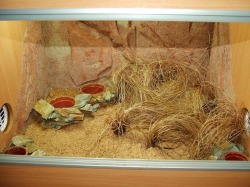
This is the viv fully planted;
This is the viv fully planted;
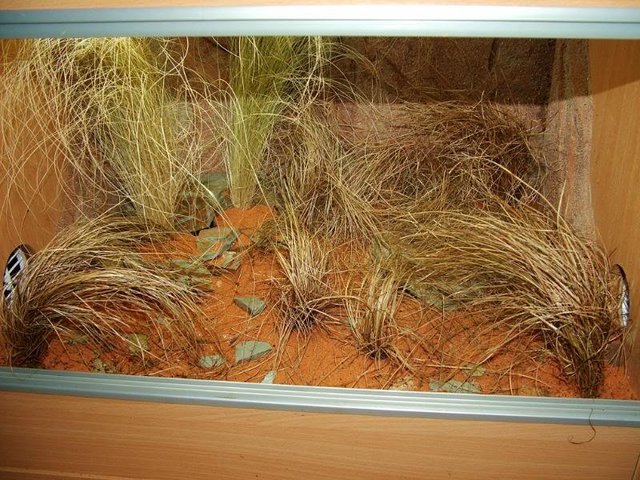
It's looking better all the time, I cut some of the grass at the back as it's too tall, and I spread it on the sand as litter. It would be nice to get it to the point where you cant see the sand for grass.
LIGHTING, PROBLEM SOLVING, MEET THE RESIDENTS: PAGE 2
LIGHTING, PROBLEM SOLVING, MEET THE RESIDENTS: PAGE 2
