Loading
BREEDING WAXWORMS
WRITTEN BY: JAKE WALKER
aka Mad baboon can be found at:
http://www.reptileforums.co.uk/
I have found a very successful way to breed waxworms. so i made a tutorial on here for all you guys that dont want to spend £2.50 for a small number of waxies.
you should get around 300 - 500 waxies this way.
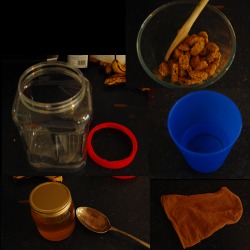
items You will need:
tall container (with the middle of the lid cut out)
Honey
water
wheatabix
foot from a pair of tights
small amount of corigated cardboard
and
a tissue
total cost*with waxworms*: £4.40 (tesco prices)
Note: *the total cost is for the whole items not just the bits you use. i will not ad the price for things like tissue, carboard, tights and the container.*
aka Mad baboon can be found at:
http://www.reptileforums.co.uk/
I have found a very successful way to breed waxworms. so i made a tutorial on here for all you guys that dont want to spend £2.50 for a small number of waxies.
you should get around 300 - 500 waxies this way.
items You will need:
tall container (with the middle of the lid cut out)
Honey
water
wheatabix
foot from a pair of tights
small amount of corigated cardboard
and
a tissue
total cost*with waxworms*: £4.40 (tesco prices)
Note: *the total cost is for the whole items not just the bits you use. i will not ad the price for things like tissue, carboard, tights and the container.*
Step one:
get all of the items above ready.
*clean out the continer first!*cut a hole in the lid of your container. its best to have a tall one for the moths to fly about in it(I got mine from costco it had honey coated nuts in).
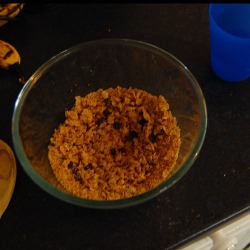
Step two:
ok now we start to make the culture (the food for the waxies/baby waxies)
Put your wheatabix in a bowl (make sure its a strong bowl) in this tutorial im using mini fruit and nut wheatabix because its all i had. try and get the normal stuff.
ok you need to crush the wheatabix up like so:
get all of the items above ready.
*clean out the continer first!*cut a hole in the lid of your container. its best to have a tall one for the moths to fly about in it(I got mine from costco it had honey coated nuts in).
Step two:
ok now we start to make the culture (the food for the waxies/baby waxies)
Put your wheatabix in a bowl (make sure its a strong bowl) in this tutorial im using mini fruit and nut wheatabix because its all i had. try and get the normal stuff.
ok you need to crush the wheatabix up like so:
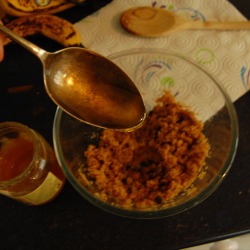
Step three:
now we shall add the water and the honey. you need hardly any water just put it under the tap and turn it on and off so there is a little bit just to bind the weatabix together.
now we shall add the water and the honey. you need hardly any water just put it under the tap and turn it on and off so there is a little bit just to bind the weatabix together.

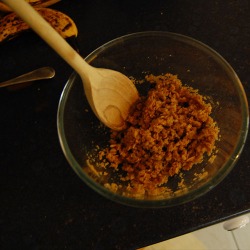
now add 1 - 2 spoons of honey. this will be what they get there energy from. You can even put honeycomb in as well.
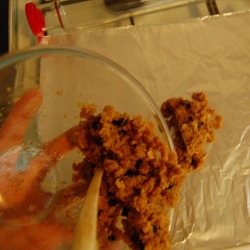
now mix them both together and it should stick together but not wet and soggy, it should look like this.
Step four:
now wrap up your mixture and leave it in the fridge to harden/ dry out a little bit. then break it up and put it in the bottem of the container.
now wrap up your mixture and leave it in the fridge to harden/ dry out a little bit. then break it up and put it in the bottem of the container.
Step five:
now while your waiting for it to harden you can start by making things to go in your container.
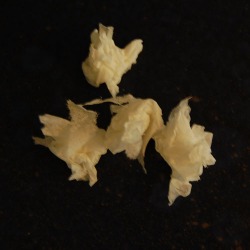
this is a very simple step all you need to do is scrunch up your tissue in small bits, about four like so:
now while your waiting for it to harden you can start by making things to go in your container.
this is a very simple step all you need to do is scrunch up your tissue in small bits, about four like so:
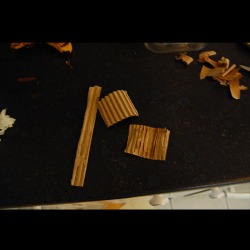
now get your cardboard and cut a thin long strip and two small squares. these will help your moths cling onto something to help them mate, and lay there eggs. then strip the outer layer of brown paper away to reveal the corrigated bit. this isnt as slippery for them.
like so:
like so:
step six:
now to make the lid so the moths don't escape!
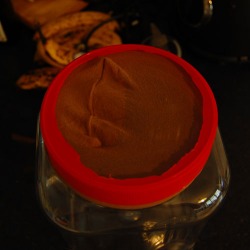
ok get your tights and cut the foot off. and grab the lid you cut the middle out of and see if it fits. mine looks like this.
now to make the lid so the moths don't escape!
ok get your tights and cut the foot off. and grab the lid you cut the middle out of and see if it fits. mine looks like this.
if it fits then screw the lid on or tie on with an elastic band...
step seven:
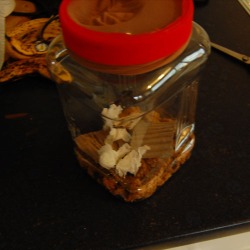
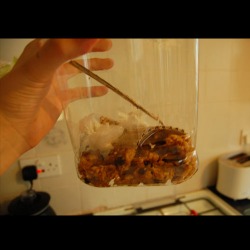
now to put it together. get the culture from the fridge or where ever you put it and crumble it in the bottem then add the cardboard and then put the tissue in.
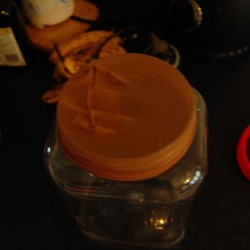
and here it is the finished product.
now to put it together. get the culture from the fridge or where ever you put it and crumble it in the bottem then add the cardboard and then put the tissue in.
and here it is the finished product.
there it is all done now place in a warm room (in your reptile room or another room) and leave for a few months then have a look. you may need to break up the culture before you see any.
a couple more things to know:
the paper is to help them lay their eggs
the tights for a lid helps the air flow (you need this dont put air holes they will most likely die)
moths dont eat anything and are alive for about 10-15 days
a couple more things to know:
the paper is to help them lay their eggs
the tights for a lid helps the air flow (you need this dont put air holes they will most likely die)
moths dont eat anything and are alive for about 10-15 days
THANK YOU JAKE!
Jake aka Mad baboon can be found at: http://www.reptileforums.co.uk/
Jake aka Mad baboon can be found at: http://www.reptileforums.co.uk/
