Loading
Tough Guy 2000 Incubator
STEVE RAFFAELE
www.westerngecko.ca
This is what I like to call my Tough Guy 2000 Incubator. It's a large Canadian Tire cooler that I've converted into an incubator. I used a scrap piece of yellow plastic that I was given to me at a garage sale and attached flexwatt for the heat source.
Here are some pictures of the various stages of construction.
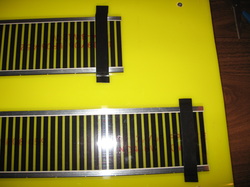
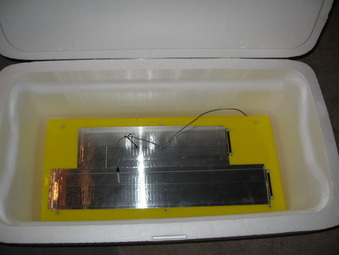
I started by attaching the flexwatt to the plastic with a piece of electrical tape so it stays put while I attach it permanently with foil tape. The reason the two strips of flexwatt are different sizes is that I used two pieces of scrap flexwatt I had left over from another project.
Here are some pictures of the various stages of construction.
I started by attaching the flexwatt to the plastic with a piece of electrical tape so it stays put while I attach it permanently with foil tape. The reason the two strips of flexwatt are different sizes is that I used two pieces of scrap flexwatt I had left over from another project.
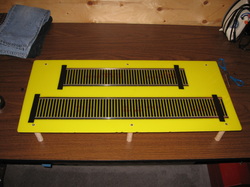
Legs are attached to the sheet of plastic with wooden dowels and wood screws.
Here is where the Tough Guy label came from...

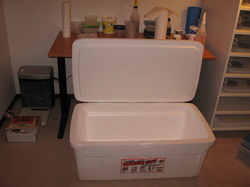
Here's a better shot of the cooler pre-conversion. The lid is attached with a piece of clear packing tape.
Here I'm trial fitting the heating element to the cooler.

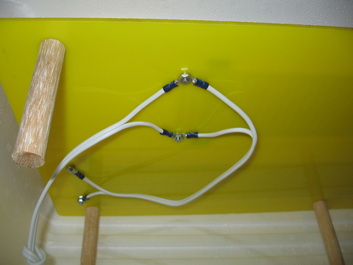
This shows the electrical connections that are made to the underside of the plastic. I use automotive crimp on connectors. Quick and easy! The legs came from an old broom stick that I had in the garage.
Here you can see the foil tape covering the flexwatt and the Herpstat probe sitting on top of the heating element.
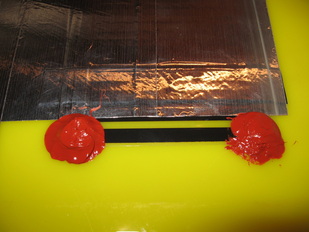
High temperature silicone is used to cover the electrical contacts just on the top of the heating element.
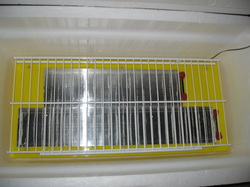
I used some steel rung shelving I had left over from another project for the egg containers to sit on.
The Tough Guy 2000 is very good at keeping a steady temperature. I thought I might need to put some water bottles in the bottom to keep the temperature steady but once it comes up to the correct temperature I can open the lid for up to 60 seconds without getting a 1 degree F drop in temperature.
The total cost for the Tough Guy 2000 was really only $20. This was the cost of the cooler. All the other stuff was left over from other projects.
Tough Guy 2000 Incubator (March 2008 UPDATE)
I've made a few changes to the design of the Tough Guy 200 Incubator so I thought I should post some additional information and a few pictures...
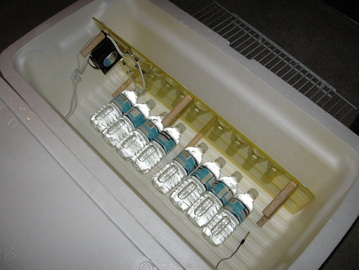
I've added an AC fan to help circulate the air preventing hot spots in the incubator. I don't think it was really needed but it was an easy addition so I though I would give it a shot! The fan cost $20 at Active Components. I mounted it to the yellow plastic sheet with some tie wraps. It has its own separate wiring and wall plug.
I've made a few changes to the design of the Tough Guy 200 Incubator so I thought I should post some additional information and a few pictures...
I've added an AC fan to help circulate the air preventing hot spots in the incubator. I don't think it was really needed but it was an easy addition so I though I would give it a shot! The fan cost $20 at Active Components. I mounted it to the yellow plastic sheet with some tie wraps. It has its own separate wiring and wall plug.
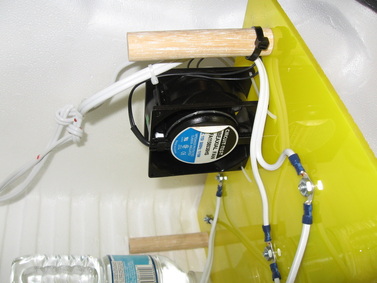
I also added some water bottles to the bottom of the incubator to act as a heat sync. This will help in the case of a power outage by giving off heat when the heat tape is out of operation. The fan directs the air flow directly across the water bottles. Once again I don't think I really needed these but they were an easy and fast addition.